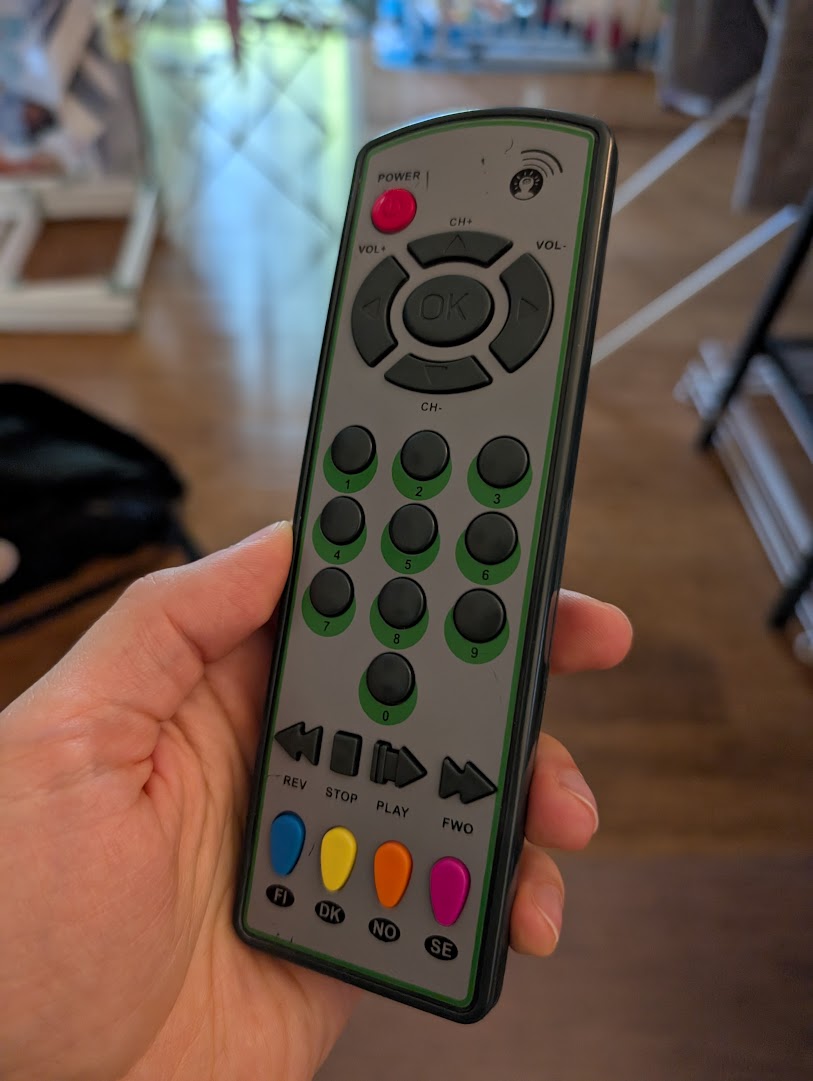
Kake Toy

Kake is a MicroPython-based firmware for a little toy remote that plays MIDI and MOD music as well as various sounds.
The four colorful buttons the bottom are used to switch between the following modes:
Mode 1: Numbers
- Each button says a number or a day of the week.
- The volume buttons control the volume (same in every mode).
Mode 2: MOD music
- Each button plays a .MOD (Amiga Protracker) music file.
- The RGB led blinks along the patterns of the song.
- I use HxCModPlayer as the playback library.
Mode 3: Instruments
- Each button plays an instrument at a different note.
- The Reverse/Stop/Play/Forward buttons change between instruments.
- The Channel/OK/Power buttons play drum samples.
Mode 4: MIDI music
- Each button plays a .MID (MIDI) song.
- I use TinySoundFont as the playback library with an added lower quality fixed point mixing mode to allow for more channels on slow hardware.
Compiling and installing
First, check out all submodules:
git submodule init
git submodule update --recursive --remote
Next, compile the rp2040 version of MicroPython with our custom native module:
cd micropython
make BOARD=RPI_PICO submodules
cd ports/rp2
make USER_C_MODULES=../../examples/kakenative/micropython.cmake -j8
Next, flash the generated firmware from micropython/ports/rp2/build-RPI_PICO/firmware.uf2 to the Pico.
Finally, copy all the Python files plus data files from under data/ to the
MicroPython filesystem using Thonny.
Sofware simulator
The project also contains a simple software simulator based on Pyxel for running the firmware on a normal computer. To run it:
- Install uv if you already haven’t.
- Build the native music playback module:
cd sim_mod
make
Finally, run the simulator:
uv run main.py
Hardware
This basis for this project is a modified multilingual TV remote control toy. You can find similar ones all over. One day, the toy suddenly stopped working, which was enough motivation for me to pull it apart and start this project.
The microcontroller is a WaveShare RP2040-Zero, which just about fits inside the chassis. Its specs are:
- Dual core ARM Cortex M0+ (133 MHz) (only one core is currenly used)
- 264 KB SRAM
- 2 MB flash
- No FPU
There is additionally a MAX98357 based amplifier for the speaker.
Wiring
The keyboard scan matrix on the original PCB is wired as follows:
| Button | Input - Output |
|---|---|
| power | B3 - E3 |
| ch+ | B2 - E3 |
| vol+ | B2 - E1 |
| ok | B3 - E2 |
| vol- | B2 - E0 |
| ch- | B2 - E2 |
| 1 | A3 - E1 |
| 2 | A3 - E0 |
| 3 | A2 - E3 |
| 4 | A2 - E2 |
| 5 | A2 - E1 |
| 6 | A2 - E0 |
| 7 | A1 - E3 |
| 8 | A1 - E2 |
| 9 | A1 - E1 |
| 0 | A3 - E2 |
| rev | B3 - E1 |
| stop | B0 - E2 |
| play | B3 - E0 |
| fwd | B1 - E3 |
| fi | B0 - E3 |
| dk | B0 - E1 |
| no | B0 - E0 |
| se | A3 - E3 |
These are wired to the following GPIO pins on the Pico:

| Pin | Connection |
|---|---|
| vsys | battery+ |
| gnd | battery- |
| gp9 | E0 |
| gp10 | E1 |
| gp11 | E2 |
| gp12 | E3 |
| gp14 | A1 |
| gp15 | A2 |
| gp26 | A3 |
| gp0 | B0 |
| gp1 | B1 |
| gp2 | B2 |
| gp3 | B3 |
| gp5 | max98357 DIN (SD) |
| gp6 | max98357 BCLK (SCK) |
| gp7 | max98357 LRCLK (WS) |
| gp4 | led+ |
| gnd | led- |
Power management
The microcontroller is powered by two AAA batteries. In order to make them last as long as possible, I shut down the microcontroller after two minutes of inactivity.
I originally wanted to use the power button to wake the microcontroller again, but the buttons on the remote are flaky enough that they start registering presses on their own if you leave the corresponding output pin high for more than a few tens of milliseconds.
The plan B was a tilt ball switch that triggers the wake up interrupt when the remote is rotated or shaken.
The repository contains a version of MicroPython as a subproject with modifications to allow this wake up from deep sleep.
Downloads
- Source code · https://github.com/skyostil/kake